Making a ‘how-to’ video for clients

For many of your clients, routine cleaning of their dogs’ ears can be intimidating; almost as much as it might be for you to create your own “how-to” video to post to your website or blog describing the procedure. Overcoming that stage fright to create and share personalized videos with your clients can help them build a more personal connection with you and your practice.
The following suggestions and steps will, hopefully, make the process less painful for you in order to help you create a video worth sharing.
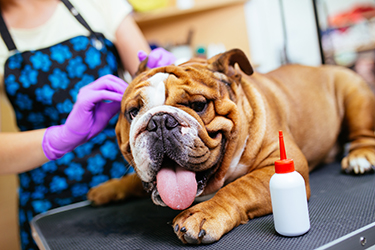
- Before you jump right in and begin the recording process, make sure you have all of the tools you will need. For an ear cleaning demonstration, you will want to have on hand the cleaning solution you are recommending, cotton balls (most clients will have these on hand), a technician, a patient, a model of the canine ear (or detailed drawing) and perhaps a treat to offer your four-legged helper.
- Although you may feel you can just as easily take out your smartphone and begin the recording right away, it will make a great difference in the professional nature of the video if you take the time to script out what you plan to cover. As you sit and write this out, you may come to realize that you had forgotten to introduce your technician and the dog that are helping you!
- Take the time to prepare your “set”. It will be simple to film this on an exam table in your clinic but before you get started, take a moment to remove any clutter on side tables, trays or cabinets. If you are able to remove extra posters or signs, this is also helpful. The less there is in the room to distract the viewer, the easier it will be for them to focus on the subject.
- While you are cleaning up the room, take a moment to listen very carefully for any additional background noise. Is the vent blowing for the heat or air conditioner? It may increase the comfort level in the room, but the low-level noise will be picked up on the recording and possibly be a distraction. Does the clinic have ambient music playing in the background? If so, you may want to turn it off during the recording.
- Take a moment to look at your lighting in the room. Most exam rooms have simple overhead tube lights which can potentially cast shadows on faces. Consider adding an additional “soft” light source at a 45º angle to the camera, at eye level. This will remove any risk of shadows and brighten the image for the recording. If there is a window in the room, make sure it is in front of you, or out of the image if to the side. You don’t want to record a video of your reflection in the window. Same goes for glass cabinets.
- Be willing to invest a small amount for a tripod for the camera. This will eliminate shaking and vastly improve the video quality. Sound recording is just as critical. Lapel microphones are available for as little as $17 online. Just verify the one you purchase is compatible with your smartphone.
- Now you are ready to get the ball rolling. You don’t need a long introduction. The goal here is to have the video run at or just less than 3 minutes. Once you introduce the subject matter and your helpers (human and canine), jump right in and begin the demonstration.
- It’s OK to have fun with this recording. Be willing to help the client feel comfortable doing this unfamiliar procedure on their dog. If you are relaxed and having fun, it will come across on the recording.
- Give some pre-cleaning advice to your client. For example, let them know that their dog will want to shake her head after the cleaning, which is perfectly normal but can cause some of the built up ear wax to “come loose.” They may want to take on this procedure in a room that can be wiped down or even outside.
- Since you wrote out a script and practiced it a few times, take your time and speak clearly and at a normal, conversational pace. Don’t rush your comments as they may come across with less clarity on the recording.
- Repeating important concepts and steps is perfectly acceptable. For example, you may want to state more than once, if the owner notices a change in the appearance of their pet’s ears over time, they should contact the clinic for an exam. It could be an early sign of infection.
- Encourage your viewers to call your clinic if they have any questions related to the video or the ear cleaning process. Offer to show them in person the process at their next office visit.
- Now that your video recording session is completed there are dozens of video editing apps available. Whichever you use, keep it simple. Use the noise cancelling feature to clean up background noise, while editing out pauses or silence and adjusting the lighting if needed.
- Congratulations! You are ready to share you video with your clients.
References
12 Simple Steps for Making Your Videos Look More Professional
https://wave.video/blog/12-simple-tips-for-making-your-videos-look-more-professional/
5 Quick Tips for Making an Effective How-To Video
https://wistia.com/learn/production/making-how-to-videos
How To: Make Great How-To Video
https://mashable.com/2010/06/03/how-to-make-how-to-video/
Careers
Are you looking for a place to let your talents shine? At Covetrus, we help our practitioner customers better serve their patients and take pride in providing the best customer experience possible. Search our open positions to see our available opportunities.
Newsletter
Stay current with what’s going on with Covetrus, subscribe to receive our newsletter and email communications. Subscribers will receive the latest information in practice management, sales and marketing, animal health, and more.


Leave a comment